Wednesday, December 30, 2009

Christmas Dinner 2009: Chinese Hot Pot

I unfortunately had to work half a day on Christmas Eve this year, then drive 6 hours to my mother's in Montréal. What kept me going was knowing that I would be enjoying a great meal at the end of my drive. As I walked in to my mom's house, she was deep frying wonton's and chả giò (Vietnamese fried spring rolls) - another recipe that's on my list for 2010.

IMG_9339
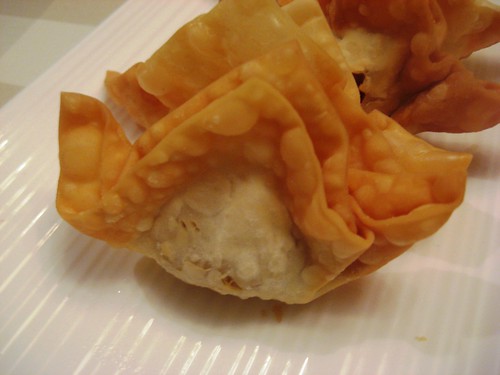
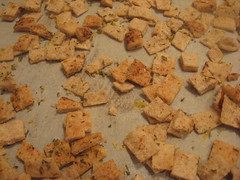
Deep fried wonton's filled mainly with ground shrimp and a bit of pork.

My mom had been asking my sister and me what we wanted for our Christmas meal. We also discussed having it at my sister's like last year's, or at her place. Finally, my sister asked if we could have hot pot. Strangely, it's a tradition at my sister's fiancé D's family to have Chinese hot pot (fondue chinoise) for Christmas dinner. However, my sister stated that it was different from how our family usually does it.

IMG_9350
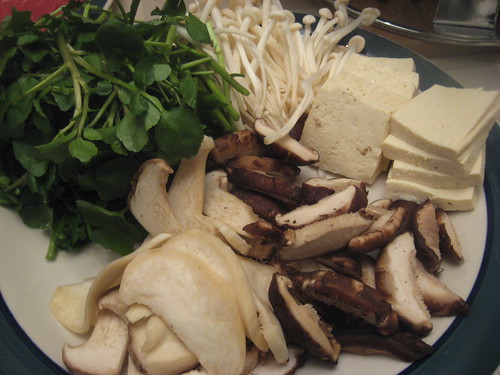
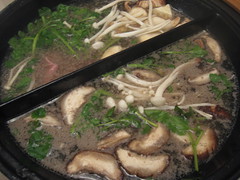
Variety of mushrooms, watercress and tofu.

I'm not sure how my mom's hot pot is different, but doing a quick recipe search for fondue chinoise seems to indicate that fondue chinoise has been quite "westernized" with ingredients like Worcestershire sauce and red wine for the broth (at least here in Québec). My mom just made a (Vietnamese flavoured) chicken broth. She also added a few pieces of taro for added flavour. She heated up before adding to the hot pot that my sister and D brought over.

IMG_9349
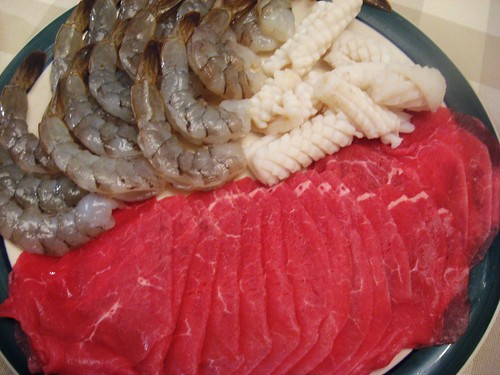
Beef, shrimp and cuttlefish.

For the ingredients to be dipped in the hot broth, my mom had a variety of mushrooms (enoki mushrooms, meaty Chinese shiitake mushrooms and king oyster mushrooms), watercress, tofu, slices of beef (specifically for fondue), shrimps and cuttlefish. For the dipping sauce, my mom mixed soy sauce, sesame oil, green onion, minced ginger and a bit of sugar, and watered it down (adjust any of the ingredients to taste). She then microwaved it for 1-2 minutes so the green onions were cooked.

Eating hot pot is quite a social activity and forces people to take their time with their meals. We had fun cooking our foods and dipping each item in the sauce. You also have to know how long different items take to cook. My sister and I were making fun of D for liking his beef slices overcooked while we liked it just pink. I had trouble not overcooking the pieces of cuttlefish. At the end, I spooned out some broth and had it as soup. It was quite hearty with the flavours of everything that had been cooked in it.

IMG_9346 IMG_9352
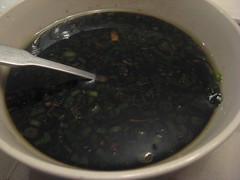
Dipping sauce and cooking the ingredients.

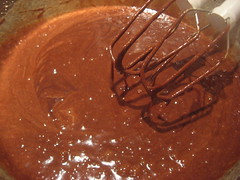
Finally, my sister contributed to Christmas dinner by making Martha Stewart's bûche de Noël (yule log) for dessert. She had a bit of difficulty making it pretty (especially rolling the génoise - which I also watch Anna & Kristina struggle with on their Christmas special!) but it was very tasty! I especially enjoyed the chocolate mousse filling. Another great Christmas meal!

IMG_9354
Martha Stewart's bûche de Noël.

Sunday, December 27, 2009

Truffles Three Way

I first made truffle 8 Christmases ago. It was really my first experience making Christmas treats. I remember using a large amount of butter in the chocolate and on my hands to roll the truffles. It was a messy endeavour. It's still a messy endeavour but I think I have found a recipe I really like that does not involve butter!

IMG_9311

Truffles Three Way
From use real butter's mocha truffles.
I followed the mocha truffle recipe and made two other versions. I halved the recipe so I could have less quantity and more variety. I ended up with 60 truffles instead of 120! The truffles were easy to make and could be varied to suit any flavour one prefers.

For the truffles
* ⅓ cup heavy cream (35% fat)
* 4 oz bittersweet chocolate, chopped

Heat up the cream in a small pot.
Place the chopped chocolate in a bowl and pour the hot cream until melted. (If the chocolate does not melt completely, heat it over a pot of simmering water.)
Add flavouring as you like.
For the mocha truffles: add ½ tbsp instant espresso powder into the cream before pouring onto the chocolate and ½ tbsp coffee liqueur (I had Bailey's on hand).
For the orange truffles: add ½ tbsp of orange liqueur (I used Cointreau) and some orange zest.
For the ice wine truffles: add ½ tbsp of ice wine (I used an ice wine and brandy bottle).
Cool the chocolate mixture until you can work it with your hands (I refrigerated it overnight and let it warm up a bit at room temperature).
Spoon or scoop out the chocolate (I found a mini-scooper helped keep the truffles relatively the same size).
Shape the truffles into rounder shapes by rolling them between your hands (I considered using gloves but was worried it would leave a rubbery taste - maybe medical gloves are not a good idea...).

IMG_9288 IMG_9302
Melting the chocolate and scooping out the chocolate mixture.

Coating the truffles
I liked coating the differently flavoured truffles in different coatings so they could be easily identified. You can pick which coating you prefer, or come up with new ones, like using chopped nuts or coconuts, or drizzling some white chocolate!

For the mocha truffles: I followed use real butter's original recipe by first dipping the truffles in melted chocolate (again with a bit of cream to get the right consistency) and then rolling them in cocoa.
For the orange truffles: I just dipped them in chocolate, by using two forks, and placed them on a parchment lined sheet so the chocolate solidified.
For the ice wine truffles: By the final batch, I was tired of dipping truffles into additional melted chocolate and just rolled them in powdered sugar. That was sufficient, except the truffles were smaller without the extra layer of melted chocolate.
Tada!

IMG_9296 IMG_9300
Rolling the chocolate into spheres and rolling them into cocoa powder.

IMG_9308
Truffles take a bit of effort but taste great and are oh so pretty!

For more ideas for Christmas baked goods:
* Last year's included chocolate hazelnut biscotti, French chocolate bark & cranberry pecan bars
* Chocolate Crinkles
* Date Squares
* Orange-Almond Buttons
* Mocha Toffee Bars

Saturday, December 26, 2009

Mocha Toffee Bars

These mocha toffee bars are actually the first recipe I made for my Christmas package. They represent 1987 in Gourmet's Favorite Cookie Recipes: 1984-2008 collection. There were quasi-successful. However, the advantages of being a food blog reader is that you get to learn from the mistakes of the food blog writer! Other than that, they were good but not remarkable. I'll admit I might be influenced by the slight frustration I experienced. I think they are similar enough to the Just-like-Skor Bars recipe that I would just stick to it (and this is when I realized I have never posted on the Just-like-Skor Bar recipe; it will have to be in 2010 then!).

IMG_9223

Mocha Toffee Bars - Makes 40 bars
From Gourmet, December 1987.
My frustration with these toffee bars can easily be remedied. I had daintily sprinkled cashew pieces onto the melted chocolate and let it set. In hindsight, I should have pressed on the cashews to make sure they stuck. I discovered this as the cashew pieces fell off the bars as I was cutting them. I then decided to quickly broil the bars to melt the chocolate and stick the cashews again. That's when I forgot them and burnt a few. So you get to learn from my mistakes if you decide to make this recipe!

* 2 sticks (1 cup) unsalted butter, softened
* 1 cup firmly packed brown sugar
* 1 large egg yolk
* 1-½ teaspoons vanilla
* 3 tablespoons instant espresso powder dissolved in 2 tablespoons boiling water
* ½ teaspoon salt
* 2 cups all-purpose flour
* 8 oz semisweet chocolate, chopped or use chocolate chips
¾ cup salted roasted cashews, chopped

In a bowl with an electric mixer cream the butter, add the brown sugar, and beat the mixture until it is light and fluffy.
Beat in the yolk, add the vanilla and the espresso mixture, a little at a time, and beat the mixture until it is combined well.
Add the salt and the flour, and beat the mixture until is combined well.
Spread the batter evenly in a jelly-roll pan (or parchment-lined cookie sheet), 15-½" by 10-½" by 1".
Bake it in the middle of a preheated 350° F oven for 15 to 20 minutes, or until it pulls away slightly from the edge of the pan and set aside.
Meanwhile, melt the chocolate over simmering water.
Spread the melted chocolate evenly over the baked layer and sprinkle the cashews over it (make sure you press on them firmly!).
Let the mixture cool in the pan on a rack, cut it into bars, and chill until the chocolate is firm.
Tada!

IMG_9196 IMG_9200
IMG_9202 IMG_9203
I also thought it was rather difficult to spread the batter onto a cookie sheet.

For more ideas for Christmas baked goods:
* Last year's included chocolate hazelnut biscotti, French chocolate bark & cranberry pecan bars
* Chocolate Crinkles
* Date Squares
* Orange-Almond Buttons
* Truffles Three Way

Friday, December 25, 2009

Orange-Almond Buttons

As I was surfing Design*Sponge, one of the blogs I check out on a daily basis, I was introduced to the food blog Lottie + Doof's 12 Days of Cookies in the "in the kitchen with" series. I was instantly attracted to their Day 10 cookie, orange-almond buttons, for various reasons: 1) they combine orange and almond (my mom would love that), 2) they were pretty and 3) the recipe promised they would taste like Fruit Loops (I likey Fruit Loops!).

IMG_9292

These cookies were easy to make and were quite a hit with everyone who tried them! It also fulfilled the promise of tasting like Fruit Loops without any artificial ingredients. As I look back now at the original recipe, I realize my cookies don't look exactly the same. Mine look smoother, which I'm guessing is because I grounded the almonds more finely. I also like the look of skins on the almond slices better but I couldn't find them at the grocery store.

Orange-Almond Buttons - Makes 36 cookies
From Lottie + Doof's 12 Days of Cookies.
The cookies were easy and quick to make. I was worried a bit about not properly whipping the egg whites and the batter being too runny but they came out well. I spooned the cookies rather than piping them.
Note that the almond quantities are broken down into two: for the cookies and for decorating. I read the recipe quickly and only bought ½ cup of almonds, and realized I needed one cup. Finally, I only used a handful of almonds for decorating since the cookies are pretty small.

* 2-½ ounces (heaping ½ cup) blanched or unblanched almonds
* ½ cup granulated sugar
* 3 tbsp unbleached all-purpose flour
* 1 tbsp finely grated orange zest
* 2 extra-large egg whites
* ½ cup sliced almonds (for decorating)
* confectioner’s sugar (for decorating)

Preheat the oven to 350°F.
In the bowl of a food processor fitted with the steel blade, combine nuts with 2 tablespoons of the granulated sugar and process until it’s the consistency of a fine meal.
Add ¼ cup of the granulated sugar, the flour, and orange zest, and pulse on and off until just combined.
In the bowl of an electric mixer fitted with the whisk attachment, whip the egg whites on low, until frothy.
Turn the mixer up to medium-high and beat until soft peaks form, another 2 to 3 minutes.
Turn the mixer to high, gradually add the remaining 2 tablespoons of the sugar, and beat until stiff peaks form, about 2 to 3 more minutes.
Remove the bowl from the mixer.
In 3 batches, gently fold in the nut mixture to incorporate.
If using a pasty bag, fill it half full.
Working quickly, pipe or spoon (about 1-2 tsp) the batter into circles, about 1 inch in diameter and spaced about 1 inch apart on a parchment-lined baking sheet.
Scatter about 3 to 5 sliced almonds over each circle, allowing the nuts to topple off the edge slightly while still clinging to the batter.
Sift a fine layer of powdered sugar over the cookies and bake about 20 minutes, until the nuts are lightly browned, and the cookies are slightly firm to the touch.
(I sifted more sugar after they were baked - I thought the sugar's colour melded into the cookie.)
Tada!

IMG_9277 IMG_9278
IMG_9281 IMG_9282
The orange zest made the batter very fragrant!

IMG_9283
I tried to make my spoonfuls of batter consistently the same size!

IMG_9294
These cookies are small enough for one bite!

For more ideas for Christmas baked goods:
* Last year's included chocolate hazelnut biscotti, French chocolate bark & cranberry pecan bars
* Chocolate Crinkles
* Date Squares
* Mocha Toffee Bars
* Truffles Three Way

Monday, December 21, 2009

Date Squares

I'm always on the lookout for dairy-free recipes that my mom will like (hence, the pistachio cranberry icebox cookie failure!). So when I spotted this date square recipe on Gourmet's Favourite Cookie section (an awesome reference for Christmas baking, by the way!), I thought perfect. My mom also really likes dates. The date squares were easy to make and came out pretty well, although a bit too sweet for my taste.

IMG_9269

Date Squares
From Gourmet, September 1945.
The recipe was very easy to make. My only little problem with these squares were cutting the dates. I bought whole dates, rather than pieces (because they were cheaper!). I wasn't able to use a knife because the dates were so sticky. I used scissors instead, and in a moment of inattention seriously cut my finger. Be careful!

1 cup graham cracker crumbs (about 14 crackers)
½ teaspoon salt
1-½ teaspoons baking powder
1-¾ cups dates, chopped
1 cup walnuts, chopped roughly
3 eggs
1 cup brown sugar
powdered sugar

Mix graham cracker crumbs with salt and baking powder.
Add chopped dates and walnuts.
Beat eggs well and gradually add brown sugar, then beat in the date mixture.
Pour into a well greased 9" x 9" square pan (I lined mine with parchment paper).
Bake
for 20 to 25 minutes at 375°F.
Allow to cool, and cut into small squares.
Cut while warm and sprinkle powdered sugar.
Tada!

IMG_9259 IMG_9260
IMG_9263 IMG_9266
The batter was a sweet and sticky one!

IMG_9273
A little square is all you need!

For more ideas for Christmas baked goods:

Sunday, December 20, 2009

Chocolate Crinkles

So the first post on my Christmas baked treats is one I have been waiting to make for a long time, ever since I visited Olson Foods at Ravine this summer with my sister & co. For a quick summary, my sister bought one chocolate crinkle that we divided in four and slowly savoured. Luckily, Anna Olson has the recipe on foodtv.ca for us to replicate! I thought it would be a perfect start to my Christmas baked goods!

IMG_9249

Chocolate Crinkles - Makes about 40
From Anna Olson.
When my sister excitedly made these cookies for the first time, she thought the recipe was wrong and it did not have enough flour, causing the batter to be very runny. I learned later that she did not chill the batter for the requisite 4 hours. So yes, DO plan 4 hours (or overnight as I did) to chill the batter! The batter is still very sticky to work with - think making truffles (to come!). I needed to grease my hands with oil to shape the balls. I would even add that by the third batch, the batter had warmed and softened up, making it very hard to roll. I would consider separating the batter into two bowls, or putting the bowl back in the fridge in between batches.

* ½ cup unsalted butter
* 10 oz bittersweet or semisweet chocolate, chopped
* 4 eggs, room temperature
* 1-½ cups sugar
* 2 tsp vanilla extract
* 1 tsp instant espresso powder or coffee extract
* ½ cup all purpose flour
* ½ tsp baking powder
* ¼ tsp salt
* 1-2 tbsp oil
* ⅔ cup icing sugar

Melt the chocolate and butter in a bowl, over a pot of simmering water and set aside.
Whip eggs with sugar, vanilla and espresso powder with electric beaters, until pale and thick, about 5 minutes.
In a separate bowl, combine flour, baking powder and salt.
Whisk melted chocolate into egg mixture until incorporated.
Whisk in flour mixture.
Cover batter with plastic and chill for at least 4 hours before baking (or overnight).
Preheat oven to 325 F.
Grease the palm of your hands with some oil - this will help the cookie dough from sticking and creating a sticky mess!
Spoon cookie dough by tablespoonfuls and roll gently to shape into a ball.
Roll cookie in icing sugar and place on a parchment-lined cookie sheet, leaving 2 inches between cookies.
Bake for 18-20 minutes.
To test doneness, lift a cookie off the tray – if it comes off cleanly, then cookies are done.
Tada!

IMG_9205 IMG_9206
Melting the chocolate and butter over simmering water.

IMG_9207 IMG_9208
Whipping the eggs, sugar and espresso powder.

IMG_9209 IMG_9211
Adding the chocolate mixture in.

IMG_9212 IMG_9226
The batter complete and chilled.

IMG_9232 IMG_9236
Shaping the cookies was a messy affair but worthwhile!

IMG_9243
The end result: chocolate-y goodness!

For more ideas for Christmas baked goods:
* Last year's included chocolate hazelnut biscotti, French chocolate bark & cranberry pecan bars
* Date Squares
* Orange-Almond Buttons
* Mocha Toffee Bars
* Truffles Three Way

Saturday, December 19, 2009

Christmas Baked Goods 2009

I was slow getting started Christmas baking but I'm finally done! I wanted to try all new recipes with expected results: some new favourite recipes added to my repertoire and some definite failures. I wasn't sure whether I should post recipes before or after Christmas, but I finally decided to start posting today.

IMG_9314

If you're looking for Christmas recipes right away, take a look at last year's Christmas baked goods. Otherwise, this year's recipes will be posted in the next few days:

* Chocolate Crinkles
* Date Squares
* Orange-Almond Buttons
* Mocha Toffee Bars
* Truffles Three Way

IMG_9318

My failed recipe was a pistachio cranberry icebox cookie. I was attracted by the holiday colours from the pistachios and cranberries. Unfortunately, I tried to make it dairy-free and replaced the butter with vegetable shortening. I'm not sure if that's what went wrong but I had a hard time slicing the cookies without them crumbling. I may also have put too many cranberries and pistachios which made it hard to slice. The cookies didn't taste bad; they were just too unappealing!

IMG_9319 IMG_9320
Failed cookies. Sad...

Saturday, December 12, 2009

Chopped Greek Salad

Not only did I wait very long to make this recipe that I spotted on the blog Use Real Butter, it also took me a very long time to write about it. I have been distracted by a new job and a gym membership. But I will try to end the year off not too weakly, and a visit to my mother's for the holidays should help any blog blues!

Back to the recipe! When I saw this recipe, it really appealed to me because I like Greek salads very much and I was intrigued by the chopping component. I believe I have some slight OCD tendencies, which really comes out in the kitchen when I'm chopping. I can spend a lot of time, obsessively chopping food in small, uniform pieces. My sister and mom can attest to that. But other than feeding my chopping needs, it was a very tasty salad. I really enjoyed being able to taste each ingredient in one bite, and experiencing the salty (feta, olives), crunchy (pita croutons), fresh (cucumber, tomato, peppers) and creamy (avocado) components at the same time.

IMG_9168

Chopped Greek Salad - Serves 2
Adapted from Use Real Butter's Chopped Greek Salad. As I mentioned, I really liked the addition of the pita croutons which reminded me of a fattoush salad.

For pita croutons
* 1 pita, sliced in small squares
* olive oil
* salt
* dried oregano
* garlic powder
* lemon zest

Place the small pieces of pita in a bowl.
Drizzle with olive oil making sure to coat most of them.
Sprinkle with salt, oregano, garlic powder and lemon zest.
Spread on a parchment lined baking sheet in one layer.
Broil in the oven for 5 min on the top rack - keep an eye on them or they will burn quickly!

IMG_9161 IMG_9164
Chopping the croutons and a quick broil.

For the vinaigrette

* balsamic vinegar
* olive oil
* dried oregano
* honey dijon mustard, to taste
* salt and pepper, to taste

Mix the vinegar, olive oil, oregano, mustard, salt and pepper to make a vinaigrette.

Assembling the salad
* ½ a red pepper, diced small
* 4" section of cucumber, diced small
* 1 small tomato, diced small
* ½ an avocado, diced small
* small piece of feta, diced small
* ½ a handful of olives, sliced

Place
all the vegetables, feta and olives in a bowl.
Pour the vinaigrette onto the vegetables and mix well.
Right before serving, add the pita croutons, and mix in - so they don't get soggy.
Tada!

IMG_9166
Chopped components of the salad.

IMG_9167
Healthy and also tasty!