On the last weekend of my visit back home, my mother hosted a BBQ to celebrate my sister's engagement. It was just an excuse really; my mom likes to throw a BBQ every year. At this BBQ, there were no hamburgers nor hot dogs in sight. It was Vietnamese style, so it was grilled corn and meat, served with sticky rice (with some Korean influence, I guess).
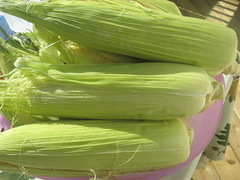
BBQ Corn I guess there are two schools of thought when it comes to barbecuing corn on the cob, with the husk on or off. We were planning to barbecue the ears with the husks on but I did a bad job removing all the silk (it kept burning), so my mom just removed it all and grilled them without the husk. No butter for our corn once it's grilled! We like to spread scallion oil (and lots of it) on it!
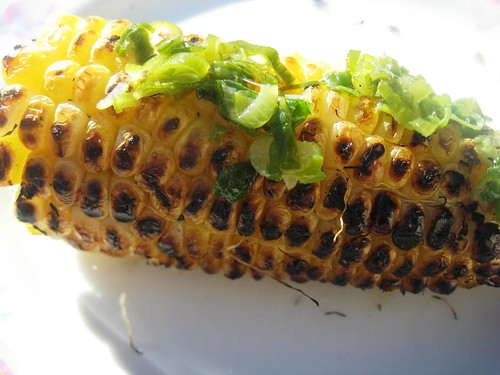
Grilled corn with scallion oil.
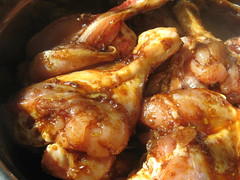
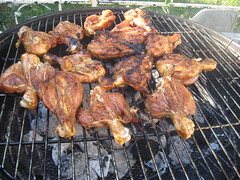
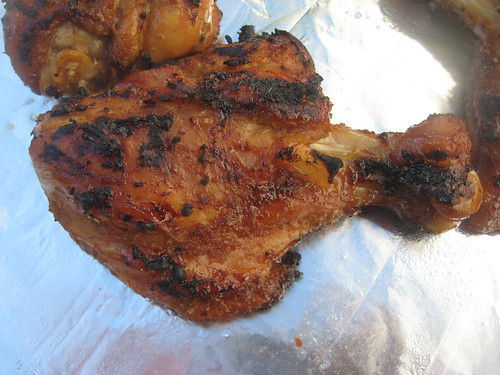
BBQ Lemongrass Chicken Drumsticks and Ribs For the meat, my mom made a lemongrass marinade for both the chicken drumsticks and ribs. She also grilled some kalbi (Korean style short ribs); I think it's her new favourite recipe!
* 3 tbsp salt * 9-10 tbsp sugar, to taste * 1 tbsp dark soy sauce * 6 tbsp minced lemongrass (can be purchased frozen) * 1-½ tbsp minced garlic * 3 kg meat (chicken drumsticks and ribs)
Mix all of the ingredients except the meat. Coat each piece of meat with the marinade and allow to marinate overnight. Grill on the BBQ. Tada!
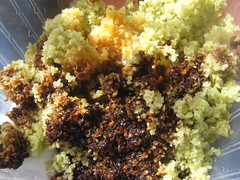
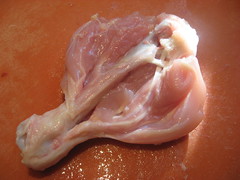
The marinade ingredients; the drumstick was cut around the bone to make sure it cooks through when barbecuing.
I don't regularly watch Alton Brown's foodtv.com show Good Eats. (On a side note, my friend Trapezista confessed to having a small crush on Alton!) However, one day last winter, I watched an episode on blueberry and saw him make a frozen blueberry pie. I love blueberries and blueberry pie! I promised myself that I would make it when blueberries were going to be in season.
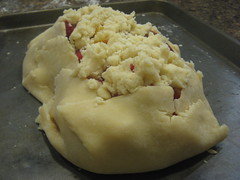
Frozen Blueberry Pie From Alton Brown's Kinda Blue (Blueberry) episode. The secret to this recipe is the frozen filling. Not only is it very easy and quick to make, but it allows you to make the filling when blueberries are in season, freeze it, and have a blueberry pie during the winter. Not that I actually did that...As for the dough, any pie dough recipe will do. On the show, Alton suggests just buying pie dough and saving your efforts on the homemade filling (which is so, so easy). I used leftover dough from the peach crostata my sister's fiancé D made the previous night.
* 4 cups blueberries * ½ cup sugar * ⅛ tsp salt * 5 tbsp tapioca flour * 1 tbsp fresh orange juice * 1 tsp orange zest * 2 (9") store-bought pie doughs * 1 egg yolk whisked with 1 tsp water
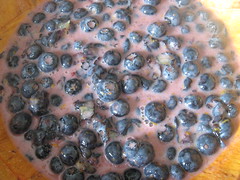
For the frozen filling Wash the berries and pat dry. Mash up half of the blueberries in a large bowl. Add the sugar, salt, tapioca flour, orange juice and orange zest and stir to combine. Let the mixture sit for 15 minutes. Fold in the whole berries. Line a 9-inch pie plate with aluminum foil. Place the blueberry mixture into the foil and place in the freezer until solid, approximately 6 to 8 hours. Once the filling is frozen, remove from the aluminum foil. Wrap in plastic wrap and store in a freezer bag for up to 3 months.
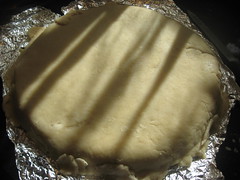
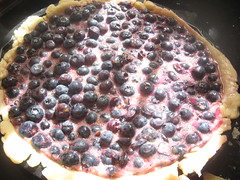
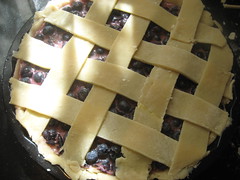
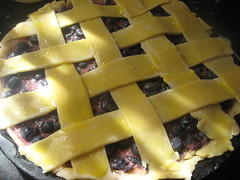
For baking the pie Preheat the oven to 325 degrees F. Place the frozen filling upside down on a plate (carefully, if your filling wasn't hard solid, like mine). Unroll first piece of dough and cover the frozen filling. Place the pie pan on top of the dough and flip over. Trim excess, if necessary. Unroll second piece of dough and cut into 1-⅛" wide strips that are 10" long. (I just eyed the width of the strips.) Lay 4 strips of dough across the top of the filling horizontally, leaving an even amount of space in between each strip. Fold back 2 alternating strips and lay down another strip in the middle of the pie, perpendicular to the other strips. Return the strips that are laid back to their original position. Next, fold back the other 2 strips and lay down a strip to the left of the center perpendicular strip. Return the strips that are laid back to their original position and repeat on the other side of the perpendicular strip, folding back the same 2 strips as you did on the other side. Once you have a lattice, brush all the strips of dough with the egg yolk, trim excess dough and pinch strips and edge of crust in order to seal. Place on the bottom rack of the oven and bake for about 1 hour 15 minutes; the pie should be bubbling lightly around the edges. If the lattice is not browned enough in the center, place under the broiler for 1 to 2 minutes Place the pie on a rack and allow to cool to room temperature before serving, approximately 1-½ to 2 hours. Tada!
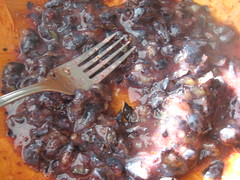
Crushing the blueberries for the filling was fun!
Since the filling was not hard rock, it was easier to cover the filling with the dough, then the pie pan and flip it.
Making a lattice with rolled dough is hard when you don't have extra dough...
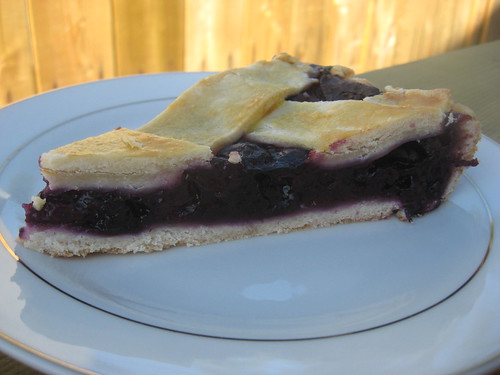
The blueberry pie came out very well! The filling had the perfect texture. The only thing I would change is adding less orange zest. I added orange zest without measuring 1 teaspoon and I thought the orange flavour was too strong, slightly overpowering. My mom, on the other hand, loved it because of the orange flavour! I would definitely make this again! I may even go look for blueberries today to have a filling in the freezer, ready for this winter!
After my sister's trip to Prince Edward Island, she had seafood on her mind. She also brought back potatoes from PEI, so she invited my mom, her husband H and I over for fish and chips. She searched the internet and decided to follow Tyler Florence's recipe for both. The recipe provided useful tips for frying.
FrenchFries Adapted from Tyler Florence. The trick for having crispy fries is to deep fry them twice. While Tyler Florence's recipe did specify the temperatures, my sister did not have a deep frying thermometer so she just tried to guess and played with the heat level. She did follow the time suggested for frying.
* salt, to taste * red chili flakes, to taste * oil * potatoes, cut into wedges
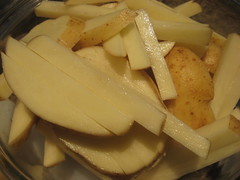
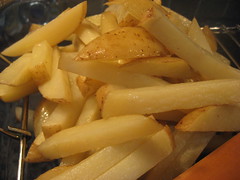
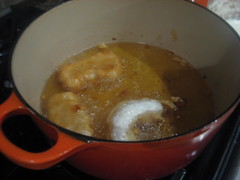
Pre-mix salt and chili flakes. Heat 3 inches of the oil to 325F (medium - medium high). Add one batch of potatoes and fry for 2-3 min; they should not be crisp or fully cooked at this point. Remove the chips to a paper towel-lined platter to drain. Repeat with the rest of the potatoes. Increase the heat to 375F (high heat). Again, add a batch of potatoes into the oil and fry for 4-5 min, until crispy and brown. Remove the chips to a paper towel-lined platter to drain. Immediately season the chips with the salt mixture while they are still hot. Repeat with the rest of the potatoes. (You can place the fries in a preheated oven if you want to keep them warm while frying the fish.) Freshly cut fries (unpeeled) and fried the first time.
Golden and well-seasoned.
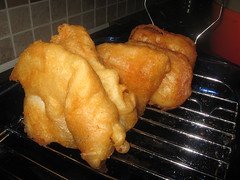
Beer Battered Fish Adapted from Tyler Florence. My sister thought the use of rice flour very effective. She replaced the soda water with beer (Corona). The crust was beautifully fluffy and crisp.
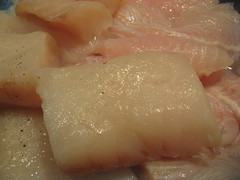
* 2 cups rice flour * 1 tbsp baking powder * salt, to taste * ground black pepper, to taste * 12 oz beef - we used Corona * 2 (8 oz) fish fillets, cut into large pieces (we used cod and basa) * ½ cup rice flour for dredging * 1 lemon, cut into wedges
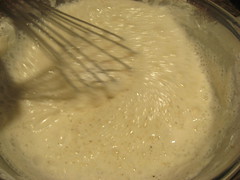
In a large bowl, combine the flour, baking powder, salt and pepper. Pour the beer into the flour mixture and whisk to a smooth batter. Spread the rice flour on a plate. Dredge the fish pieces in the rice flour and then dip them into the batter, letting the excess drip off. Add the pieces of fish into the oil (375F or high heat). Fry the fish for 4-5 minutes until crispy and brown. Serve with lemon wedges. Tada!
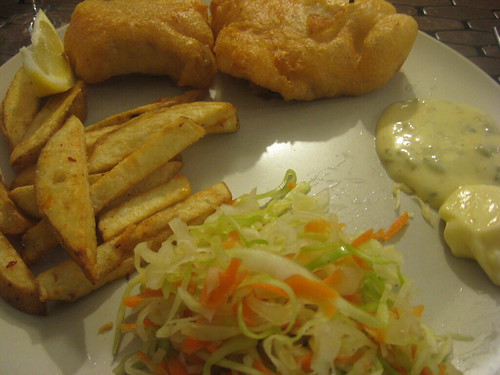
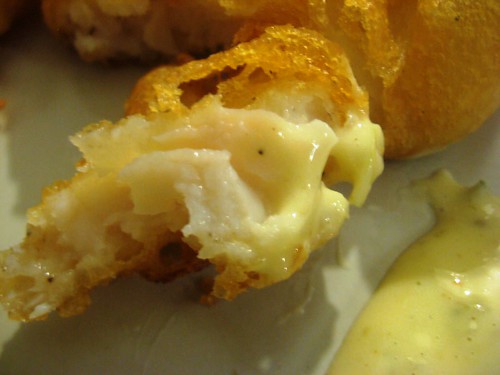
The batter was bubbly from the beer and baking powder, resulting in a nice crust for the fish. The fish was great with homemade tartar sauce.
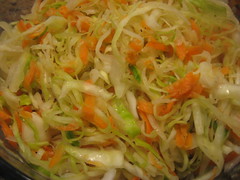
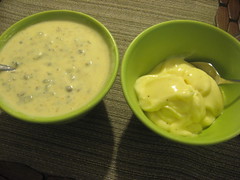
The fish & chips were served with homemade coleslaw, tartar sauce and mayonnaise (for the chips).
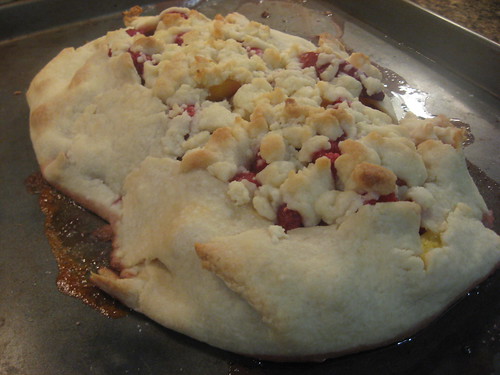
Peach Crostata My sister has made my friend The Gastronomer's peach crostata recipe a few times. She loves it because it's quick, easy and tasty. This time, her fiancéDmade the dough with shortening instead of butterbecause my mom does not like butter (he also made extra for my blueberry pie - post to come next!). He had some difficulty with the dough and it kept breaking.The crostata still came out nicely. It's great with a side of ice cream!
5623a Chemin De La Côte-des-Neiges Montréal, Québec 514.341.7120
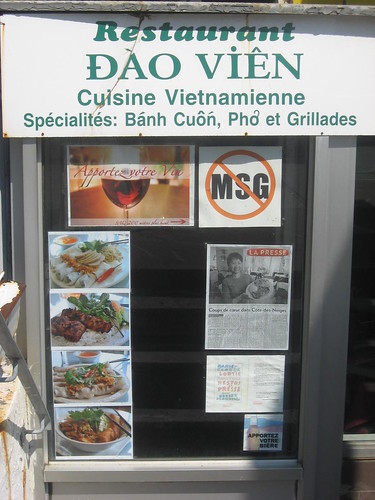
I had been craving bánh cuốn for a while. Posts about bánh cuốnon other food blogs don't help! Bánh cuốn is a Vietnamese dish consisting of ground pork rolled in rice flour sheets. It was a breakfast staple when I was in Vietnam, topped with bánh tôm. It's a bit labour intensive; though my mom has made them, she usually orders them. Actually, my neighbour here in Hamilton makes them but the minimum order is 50! This time, we decided to go to Đào Viên, which specializes in bánh cuốn.
It's good to know they do not use MSG!
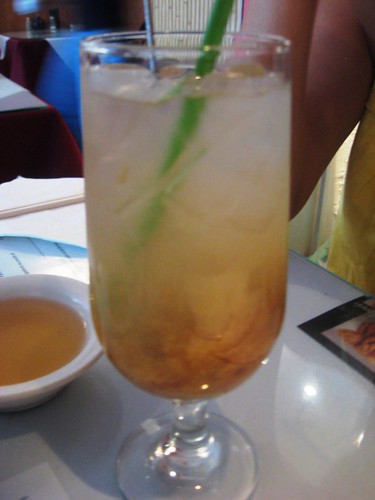
Since their condo is nearby, my sister and her fiancé biked to the restaurant to meet us. My mom and I got there early and I couldn't resist ordering a nice cool drink on one of the last days of summer. I ordered a chanh muối, a salted lemon drink ($2.50). The lemons are actually pickled with salt. I realize it's a weird combination for Westerners to have both a salty and sweet drink, but I love it! My sister ordered the xí muội (pickled plums) but thought it was too salty.
My chanh muối, salted lemon drink!
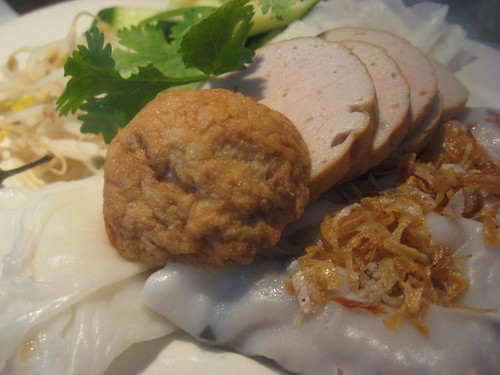
My mom, my sister and I all ordered the bánh cuốn Đào Viên plate for $7.75. The house special included both bánh cuốn andbánh ướt, served withchả chiên. Bánh ướt is essentially the same as bánh cuốn minus the meat filling; so just thin sheets of rice flour, rolled up. Chả chiên is a type of Vietnamese cold cut, made of ground pork, that has been fried (as opposed to steamed). The bánh are topped with fried onions (yum!) and are traditionally served with a side of bean sprouts. Finally, everything has to be drenched in nước chấm, fish sauce for dipping.
Bánh cuốn Đào Viên plate.
Although the restaurant specializes in bánh cuốn, it also has a selection of rice vermicelli dishes. D ordered the bún chả giò thịt nướng (rice vermicell with spring rolls and grilled meat). However, when I remembered to take a picture, he had already eaten most of it! The restaurant also offered lunch specials that included a soup for a good price. It's a small restaurant but worthwhile the stop for bánh cuốn in Montréal.
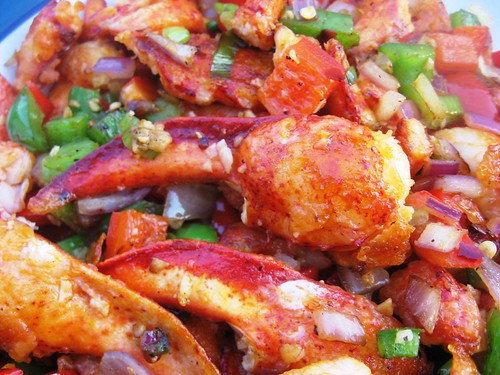
My sister and her fiancé were lucky enough to visit Prince Edward Island. Maybe because she was feeling some guilt over gorging on seafood, she brought back frozen crab and lobster. Our mom made xúp bột bán (tapioca and crab soup) with the crab. With the lobster, she made salt and pepper lobster (salt and pepper shrimp is always a favourite dish when we go to Chinese restaurants).
Salt and Pepper Lobster This is a healthier version of the restaurant dish because the lobster is pan-fried instead of deep fried. My sister bought frozen lobster claws, because that's what she likes. The lobster could be replaced with shrimp or squid.
* flour * lobster, or seafood of your choice * oil * ¼ red onion, small diced * ¼ red pepper, small diced * ¼ green pepper, small diced * 1 garlic cove, minced * salt, to taste * ground black pepper, to taste * dry chili flakes, to taste * a pinch of sugar
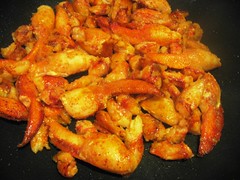
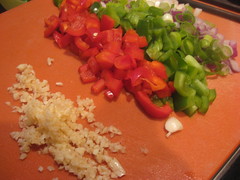
If using frozen lobster, allow to thaw and drain to minimize liquid. Slightly pat dry (it doesn't have to be completely dry, just not wet). Dredge the lobster into some flour. Heat some oil in the pan. Pan fry the lobster until golden. When the lobster is ready, set aside and add more oil to the pan. Add the peppers, onion and garlic. Also add the salt, pepper, chili flakes and sugar (my mom pre-mixed the spices and added them to taste). Again, mix the pepper mixture and let cook until golden. When it is ready, add the lobster back into the pan. Tada!
Pan frying the lobster and vegetables ready to go.
I asked my mom to teach me how to make bánh bao during my visit home. Bánh bao is the Vietnamese name for Chinese bao steamed buns. Bao, (it sounds more like pao to me), means wrap in Cantonese. There are different types of fillings for bao's, such as ones filled with char siu (Chinese BBQ pork), which are popular at dim sum. One that we make at home has a ground pork filling with an egg in the middle. My sister also loves kaya bao, a sweet version with a coconut custard filling.
Bánh Bao (Chinese Bao Steamed Dumpling) - Makes 18 Bao This is not a difficult recipe and it does not take as long as it looks, but it does require a few steps. I buy these regularly at the Asian grocery store nearby and those are also filled with some cabbage; my mom would say this is because it's a cheap ingredient! This recipe makes 18, but you can easily cut it in half.
Making the Filling * 600 g ground pork * 1 tsp salt * 1 tsp sugar * ½ tsp ground black pepper * 2 tsp cornstarch * 1 tbsp sesame oil * 2 sticks lạp xưởng (Chinese sausage), sliced * 1 handful sliced dried mushrooms (or 3 whole dried ones), soaked and well drained * 18 quail eggs, cooked and peeled - alternately use 5 chicken eggs and cut them into quarters
Mix the ground pork with the salt, sugar, pepper, cornstarch and sesame oil. Add the dried mushrooms and Chinese sausage. My sister asked that the sausage be cooked (quickly fried) beforehand to melt some of the fat; this is not necessary if you don't care about fat. Divide into 18 approximately equal portions. Take one portion of the meat and slightly flatten in your hand. Place a cooked quail egg on top of the meat and cover the meat around the egg to make a small round ball. Set aside.
The trick to peeling quailed eggs is to cool them down by soaking them in cold water.
Meat mixture with mushrooms and quickly cooked sausage slices.
Making the meat filling with a quail egg in the middle.
Making the Dough
My mom told me that she has a recipe using Brodie flour and that no other flour would work. I did not understand what was so special about this brand of flour. When she showed me the bag, I realized that it is self-raising flour. I'm guessing it could be replaced with all purpose flour with baking powder but I don't know in which proportion.
* 3/4 cup sugar
* 4-½ cups self-raising flour
* 1-½ cups milk
Mix the flour and sugar in a big bowl.
Pour the milk in and mix until it becomes a dough (you can flour your hands so the dough doesn't stick).
Let itsit for 5 minutes.
Divide into about 18 equal portions.
If you feel any lumps, work through the dough with your hands to remove them.
My mom's Brodie flour and mixing it with sugar.
Adding milk forms a dough!
Forming and Cooking the Buns
* flour
* 18 pieces of dough
* 18 balls of meat filling
* parchment paper, cut into 18 square (about 2" x 2")
On a floured surface, roll out a piece of dough into a circle, ideally tapered at the edges (this is where the dough is gathered so you don't want it too thick!).
Dip one of the prepared meat fillings in flour (this is to prevent the dough getting soggy at the bottom once the meat cooks).
With the piece of dough in one hand, place the meat filling on top.
Fold the dough over the meat with the other hand, pinching it closed while rotating the bun.
Place the bun on top of a piece of parchment paper.
Place the buns into a steamer, leaving a gap between them because the dough will expand.
Steam for 15 minutes.
Rolling the ball of dough (I was just trying to catch my sister's new ring in action!).
Covering the meat filling with the dough. Those are my mom's dextrous hands at work.
Once the buns are steamed, they are much larger.
Cutting the bun in two reveals the meat filling and the egg!
Sweet Kaya Bao - Makes 6
The same dough can be made with a sweet filling. My sister's favourite is a coconut custard that you can buy in a can. Other sweet fillings include lotus paste or red bean pastes. We ate these pretty fast as soon as they came out of the steamer!
* ⅓ of the dough recipe above, divided into 6 portions
Mix the coconut jam with the flour and cornstarch to thicken it (this also helps reduce the sweetness of the jam).
Roll the dough again.
Add about 1/6 of the filling onto the dough.
Cover the filling with the dough (my mother chose to fold these in half and fold the edges - in the same shape as bánh bột lọc. Any shape will do as long as the filling is covered up!).
Steam for 10 minutes.
Tada!
Coconut jam from a can.
Making the sweet kaya bao. The kaya oozed through the bun.


