Sunday, December 20, 2009

Chocolate Crinkles

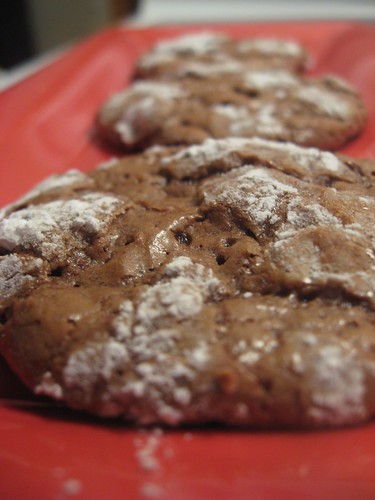
So the first post on my Christmas baked treats is one I have been waiting to make for a long time, ever since I visited Olson Foods at Ravine this summer with my sister & co. For a quick summary, my sister bought one chocolate crinkle that we divided in four and slowly savoured. Luckily, Anna Olson has the recipe on foodtv.ca for us to replicate! I thought it would be a perfect start to my Christmas baked goods!

IMG_9249

Chocolate Crinkles - Makes about 40
From Anna Olson.
When my sister excitedly made these cookies for the first time, she thought the recipe was wrong and it did not have enough flour, causing the batter to be very runny. I learned later that she did not chill the batter for the requisite 4 hours. So yes, DO plan 4 hours (or overnight as I did) to chill the batter! The batter is still very sticky to work with - think making truffles (to come!). I needed to grease my hands with oil to shape the balls. I would even add that by the third batch, the batter had warmed and softened up, making it very hard to roll. I would consider separating the batter into two bowls, or putting the bowl back in the fridge in between batches.

* ½ cup unsalted butter
* 10 oz bittersweet or semisweet chocolate, chopped
* 4 eggs, room temperature
* 1-½ cups sugar
* 2 tsp vanilla extract
* 1 tsp instant espresso powder or coffee extract
* ½ cup all purpose flour
* ½ tsp baking powder
* ¼ tsp salt
* 1-2 tbsp oil
* ⅔ cup icing sugar

Melt the chocolate and butter in a bowl, over a pot of simmering water and set aside.
Whip eggs with sugar, vanilla and espresso powder with electric beaters, until pale and thick, about 5 minutes.
In a separate bowl, combine flour, baking powder and salt.
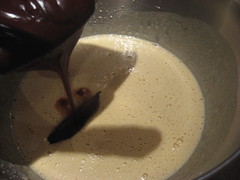
Whisk melted chocolate into egg mixture until incorporated.
Whisk in flour mixture.
Cover batter with plastic and chill for at least 4 hours before baking (or overnight).
Preheat oven to 325 F.
Grease the palm of your hands with some oil - this will help the cookie dough from sticking and creating a sticky mess!
Spoon cookie dough by tablespoonfuls and roll gently to shape into a ball.
Roll cookie in icing sugar and place on a parchment-lined cookie sheet, leaving 2 inches between cookies.
Bake for 18-20 minutes.
To test doneness, lift a cookie off the tray – if it comes off cleanly, then cookies are done.
Tada!
IMG_9205 IMG_9206
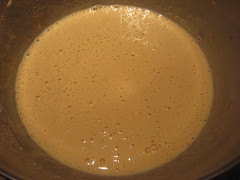
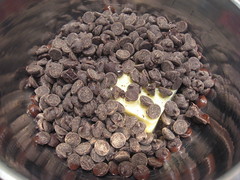
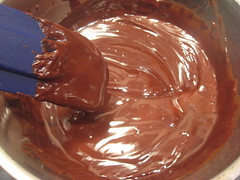
Melting the chocolate and butter over simmering water.
IMG_9207 IMG_9208
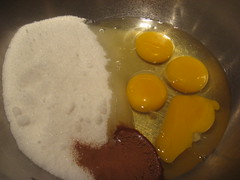
Whipping the eggs, sugar and espresso powder.
IMG_9209 IMG_9211
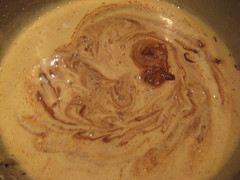
Adding the chocolate mixture in.

IMG_9212 IMG_9226
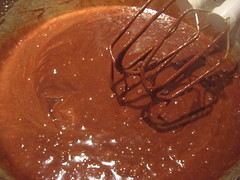
The batter complete and chilled.

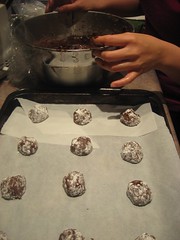
IMG_9232 IMG_9236
Shaping the cookies was a messy affair but worthwhile!
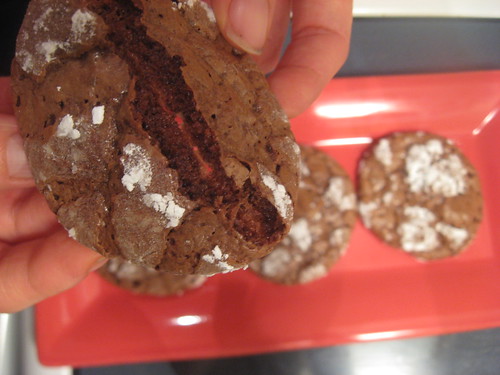
IMG_9243
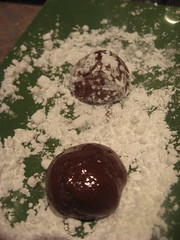
The end result: chocolate-y goodness!

For more ideas for Christmas baked goods:
* Last year's included chocolate hazelnut biscotti, French chocolate bark & cranberry pecan bars
* Date Squares
* Orange-Almond Buttons
* Mocha Toffee Bars
* Truffles Three Way

Saturday, December 19, 2009

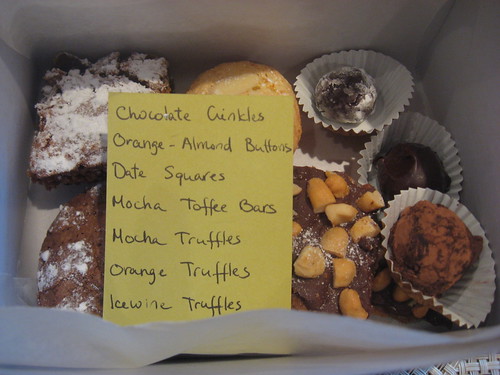
Christmas Baked Goods 2009

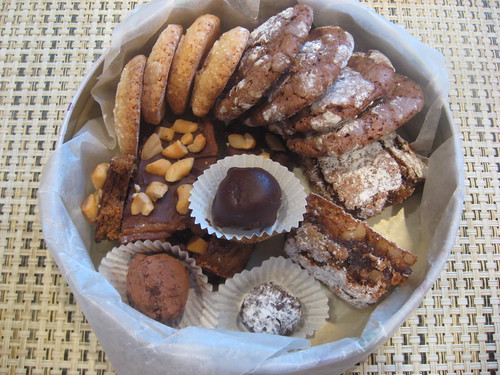
I was slow getting started Christmas baking but I'm finally done! I wanted to try all new recipes with expected results: some new favourite recipes added to my repertoire and some definite failures. I wasn't sure whether I should post recipes before or after Christmas, but I finally decided to start posting today.

IMG_9314

If you're looking for Christmas recipes right away, take a look at last year's Christmas baked goods. Otherwise, this year's recipes will be posted in the next few days:

* Chocolate Crinkles
* Date Squares
* Orange-Almond Buttons
* Mocha Toffee Bars
* Truffles Three Way
IMG_9318

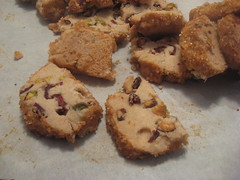
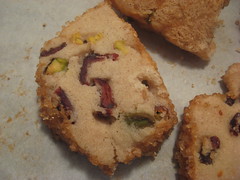
My failed recipe was a pistachio cranberry icebox cookie. I was attracted by the holiday colours from the pistachios and cranberries. Unfortunately, I tried to make it dairy-free and replaced the butter with vegetable shortening. I'm not sure if that's what went wrong but I had a hard time slicing the cookies without them crumbling. I may also have put too many cranberries and pistachios which made it hard to slice. The cookies didn't taste bad; they were just too unappealing!

IMG_9319 IMG_9320
Failed cookies. Sad...

Saturday, December 12, 2009

Chopped Greek Salad

Not only did I wait very long to make this recipe that I spotted on the blog Use Real Butter, it also took me a very long time to write about it. I have been distracted by a new job and a gym membership. But I will try to end the year off not too weakly, and a visit to my mother's for the holidays should help any blog blues!

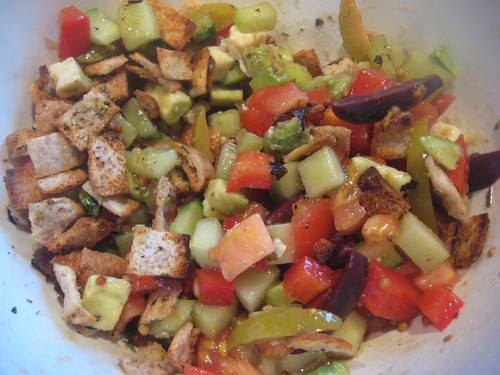
Back to the recipe! When I saw this recipe, it really appealed to me because I like Greek salads very much and I was intrigued by the chopping component. I believe I have some slight OCD tendencies, which really comes out in the kitchen when I'm chopping. I can spend a lot of time, obsessively chopping food in small, uniform pieces. My sister and mom can attest to that. But other than feeding my chopping needs, it was a very tasty salad. I really enjoyed being able to taste each ingredient in one bite, and experiencing the salty (feta, olives), crunchy (pita croutons), fresh (cucumber, tomato, peppers) and creamy (avocado) components at the same time.

IMG_9168

Chopped Greek Salad - Serves 2
Adapted from Use Real Butter's Chopped Greek Salad. As I mentioned, I really liked the addition of the pita croutons which reminded me of a fattoush salad.

For pita croutons
* 1 pita, sliced in small squares
* olive oil
* salt
* dried oregano
* garlic powder
* lemon zest

Place the small pieces of pita in a bowl.
Drizzle with olive oil making sure to coat most of them.
Sprinkle with salt, oregano, garlic powder and lemon zest.
Spread on a parchment lined baking sheet in one layer.
Broil in the oven for 5 min on the top rack - keep an eye on them or they will burn quickly!

IMG_9161 IMG_9164
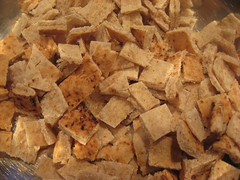
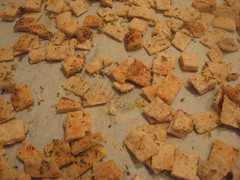
Chopping the croutons and a quick broil.

For the vinaigrette

* balsamic vinegar
* olive oil
* dried oregano
* honey dijon mustard, to taste
* salt and pepper, to taste

Mix the vinegar, olive oil, oregano, mustard, salt and pepper to make a vinaigrette.

Assembling the salad
* ½ a red pepper, diced small
* 4" section of cucumber, diced small
* 1 small tomato, diced small
* ½ an avocado, diced small
* small piece of feta, diced small
* ½ a handful of olives, sliced

Place
all the vegetables, feta and olives in a bowl.
Pour the vinaigrette onto the vegetables and mix well.
Right before serving, add the pita croutons, and mix in - so they don't get soggy.
Tada!

IMG_9166
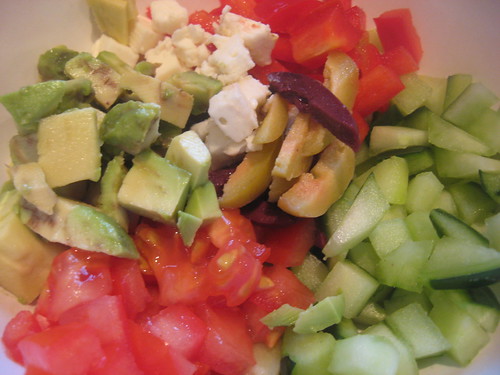
Chopped components of the salad.

IMG_9167
Healthy and also tasty!

Saturday, November 28, 2009

Roasted Butternut Squash & Pesto Pizza

When I was thinking of pizza toppings, I thought that butternut squash would make a nice seasonal one. I liked the addition of the sweet roasted squash on top of the salty pesto. I then topped it with strong and salty Asiago cheese. A perfect pizza for the fall season!

IMG_9185

Roasted Butternut Squash & Pesto Pizza - Serves 3-4
I roasted the squash but if you're in a rush, you could quickly cook it in a pan. Otherwise, the recipe is pretty straightforward. You can definitely improvise with the toppings. I think adding goat cheese would be quite tasty!

* ½ butternut squash, sliced into thin pieces
* ½ an onion, sliced thinly
* olive oil
* salt and pepper, to taste
* a sprig of rosemary, leaves picked
* pizza dough
* pesto, homemade or store-bought
* Asiago cheese, grated

In a large bowl, mix the pieces of butternut squash and slices of onion with olive oil.
Season with salt, pepper and rosemary.
Spread the mixture onto a baking sheet, and roast for 30 minutes at 350F, or until the squash is cooked through.
Meanwhile, prepare your pizza dough onto a baking sheet - I laid parchment paper, sprinkled some cornmeal and laid my pizza dough on top.
Spread pesto over the pizza dough.
Add the butternut squash mixture on top.
Sprinkle with a generous amount of Asiago cheese.
Bake at 350F until the dough is cooked and the cheese is melted, about 20-25 minutes.
Tada!

IMG_9176 IMG_9178
Preparing and roasting the butternut squash.

IMG_9184
Bite in!

For other pizza posts:
* Grilled Pizza with Pesto and Buffalo Mozzarella
* BBQ Chicken Pita Pizza
* Pesto & Roasted Vegetable Pita Pizza

Wednesday, November 25, 2009

Chicken Scallopini

In The Oprah Magazine Cookbook, I also spotted an intriguing recipe for chicken scallopini. I liked the idea of adding fresh basil and (whole pine) nuts in the crust. I made the recipe for my mom when she was over for Thanksgiving. I replaced the pine nuts with pecans. Unfortunately, I had problems with the chunks of pecans sticking to the crust so my mom suggested I process the mixture. I followed my mom's suggestion with great success!

IMG_9156
I had the chicken with broccoli stir-fried with garlic.

Chicken Scallopini - Serves 2
Adapted from The Oprah Magazine Cookbook - I don't know which chef created this recipe since my laptop is dead and I had the information in there...
I split a chicken breast and got two portions out of it, but you can definitely serve one chicken breast per serving. You can also replace the chicken with turkey or veal. I would make the breadcrumb mixture coarser to have large pieces of pecan showing. Quantities are very approximate.

* 1 chicken breast, sliced into two lengthwise
* salt and pepper, to taste
* garlic powder
* 2-3 tbsp flour
* 1 egg, beaten
* 3-4 tbsp breadcrumbs - I used panko
* 4-5 fresh basil leaves
* 1 tbsp Parmesan
* 1 tsp lemon zest
* 4-5 pecans
* ground pepper
* oil

Pound the chicken breast with a mallet until very thin (1/2").
Season with salt, pepper and garlic powder on each side.
Place the flour in one dish.
Add the beaten egg in a second dish.
In a food processor, add the breadcrumbs, basil, parmesan, lemon zest, pecan and ground pepper.
Process slightly to obtain a coarse mixture.
Place the breadcrumb mixture in a third dish.
Heat oil in a pan.
Dredge the chicken breast in the flour first, then the egg and finally the breadcrumb mixture.
Cook in the oil, 2-3 minutes per side, until the chicken is cooked through (the cooking time depends on the thickness of your chicken breast).
Tada!

IMG_9153
The breadcrumb mixture.


IMG_9157
I like the bits of green from the fresh basil.

Sunday, November 22, 2009

Pâté Chinois & Shepherd's Pie

It seems a lot of my friends are having babies these days. On my day off, I decided to offer my friend S to bring over dinner for her and her husband. I gave her a choice between chicken pot pie and pâté chinois. S decided on pâté chinois since she had pot pie recently. Another couple had a baby a day before S and I figured I'd kill two birds with one stone and offered to bring over shepherd's pie as well!

So what's the difference between pâté chinois and shepherd's pie? Well, I only realized there was a difference while watching Top Chef (definitely one of my favourite shows right now!). In Québec, we use the terms interchangeably for pâté chinois. Pâté chinois is a Québécois dish typically containing ground beef, corn (or cream of corn) and mashed potatoes, and served with ketchup. Shepherd's pie is an English version, made with lamb, and definitely with no corn. There are other variations, including hachis parmentier, a French version. While I knew that S's mother is Québécoise and would expect corn, I wasn't sure about what my other friends would expect in shepherd's pie so I decided to make both versions.

IMG_9139
Shepherd's pie.

Pâté Chinois & Shepherd's Pie - Serves 3-4

While I made two pies, I will only include quantities for one. You can pick whether you want to go the Québécois or English way.

Meat Mixture
I actually added some lean ground chicken to make this dish a bit healthier. Any combination of ground meat can be used. I used the same meat mixture for both pies and divided it in two.

* oil
* 1-2 garlic cloves, minced
* 1 onion, chopped finely
* 500 g (1 lb) ground meat
* salt, to taste
* freshly ground black pepper, to taste
* 3-4 fresh sprigs of thyme
* 1 sprig of rosemary
* ½ cup of red wine
* 1-2 tbsp tomato paste.

Heat up oil in a large skillet.
Add the onion and garlic, and cook until softened.
Add the meat, and break apart while cooking it.
Season with salt, pepper, thyme and rosemary.
Add the red wine and mix in the tomato paste.
Cook until the wine has evaporated.

IMG_9123 IMG_9125
IMG_9128

Adding the vegetables

For the pâté chinois:
I used corn that I had frozen during the summer. I stir fried it with some green onion and seasoned it with salt and pepper. You could just use canned corn or cream of corn if you prefer.
Cover the bottom of a 9"x9" square baking dish with the meat mixture.

Top with the corn.

For the shepherd's pie:
I added one carrot, cut into small cubes and some frozen peas into the meat mixture.
Cook the meat and vegetable mixture until the carrots are tender.
Cover the bottom of a 9"x9" square baking dish with the meat mixture.

IMG_9129IMG_9127
The base for pâté chinois and shepherd's pie respectively.

Mashed potato
Again, I don't have exact quantities, I just eyed it and tried to aim for a consistency I liked.

* 4-5 good sized potatoes (it should cover the meat and vegetables - although my friend S said she liked my meat to potato ratio, so don't make too much potato!)
* 1-2 tbsp butter
* 1-2 tbsp olive oil
* 1/3 cup Parmesan, optional
* salt and pepper
* milk
* 1 tbsp melted butter

Cook potatoes and peel them.
While hot, mash the potatoes.
Add butter and Parmesan (so they melt!).
Add milk if the mixture is too thick.
Add the olive oil, salt and pepper.
Adjust the seasoning and consistency to your tastes.
Cover the meat and vegetables with the potato mixture and spread evenly.
Go through the surface of the mashed potato with a fork, creating grooves.
Brush the grooves with melted butter, so it browns nicely.
Bake in the oven for 30 min at 350F. (At this point, all the ingredients are cooked, so you're just heating the pie up.)
Broil on high for 5 minutes if you want it nicely browned. (Use the time because it can burn quickly or use the low setting instead!)
Tada!

IMG_9130
Mashing the potatoes.

IMG_9131 IMG_9132
Add potatoes to both pies.

IMG_9134 IMG_9135
I really like making the grooves with a fork!

IMG_9137
Pâté Chinois.

Monday, November 9, 2009

Mediterranean Chicken Soup

It was actually a balmy 18C today. However, a week or so ago, it was getting cold and I was watching an episode of Chef at Home, in which Michael Smith was making a Mediterranean chicken soup. I thought it'd be nice to try another version of chicken soup, even though I really enjoy my tried and tested homemade recipe. I was not 100% sure how I would feel about ingredients such as red pepper and olives in chicken soup, but it was enjoyable and I would definitely add this to my soup rotation.

IMG_9114

Mediterranean Chicken Soup
Adapted from Chef at Home.
I searched in vain for Israeli couscous. I decided to replace it with barley and really enjoyed it - I've been adding barley to other soups as well. I also reduced the amount of garlic and chicken (the original recipe uses a whole chicken). Otherwise, the quantities can be taken as suggestions - I only used half a head of fennel (leftover from the homemade ketchup).

* oil
* 1 onion, peeled and chopped
* 3-4 garlic cloves, minced
* 1 head fennel, chopped
* 1 zucchini, chopped
* 1 red pepper, seeded and chopped
* 2-3 fresh tomatoes, chopped
* salt and pepper, to taste
* 1 L (4 cups) homemade chicken broth, or store-bought
* 1 cup barley
* 2 bay leaves
* 1 tbsp dried oregano
* 6 sprigs fresh thyme
* dried chili flakes
1 cup chicken, cooked
* 1 can chick peas, drained (398mL)
* a handful of olives, pits removed

In a large pot, add some oil and turn on the heat.
Cook the onion and garlic until softened.
Add the chopped vegetables: fennel, zucchini, red pepper and tomatoes.
Season with salt and pepper.
Once the vegetables have softened a bit, pour in the chicken stock and bring to a boil.
Add the barley, bay leaves, oregano, thyme and dry chili flakes.
Once the barley is cooked, add the chickpeas, olives and chicken until heated through.
If the soup is too thick, add water.
Taste and adjust seasoning accordingly.
Tada!

IMG_9111 IMG_9112
Ingredients for the soup.

IMG_9115
This chicken soup is definitely colourful!

For other chicken soup recipes to keep you warm:
* Bún Gà Xả (Lemongrass Chicken Soup)
* Cháo Gà (Chicken Porridge)
* Homemade Chicken Soup
* Miến Gà (Vietnamese Chicken Bean Thread Noodle Soup)

Friday, November 6, 2009

Bún Mộc (Vermicelli & Pork Meatball Soup)

The cold weather is coming and I like to find refuge in soups. I thought about bún mộc (vermicelli & pork meatball soup) and realized I never made it last year. I had also recently seen the recipe on the food blog Ravenous Couple. It consists of bún (rice vermicelli) and mộc, which are meatballs made of pork and studded with wood ear mushrooms - I like the addition of the mushrooms which add a crunchy texture to the meatballs.

This soup definitely can stand alone as a meal. It's also one of those very easy recipes, especially if you buy the ready made meat as I did. I just throw in some napa cabbage for added vegetable even though it's not traditional. I'm actually not sure what's traditional. I had it in Vietnam and it was basically noodles and pork.

IMG_9109

So I've thought about writing a post about chả; however, I have gotten around to it. Let's say it's in the works... The basic chả is in pork form and is the basis for many Vietnamese dishes, such as chả giò (spring rolls - and I can't believe I still don't have a post about this!) and cơm tấm chả (broken rice with pork meatloaf). You can buy chả sống (literally raw meat), pre-seasoned ground pork in the freezer of your Asian grocery store to make this dish. I'm sure you could grind your own pork to make this dish but I was looking for a specific texture that I knew the frozen stuff would provide. The 1 lb package is a bit steep at $4.99 but I used a quarter of it to make 2 good portions.

IMG_9104

Bún Mộc (Vermicelli & Pork Meatball Soup)

* handful of wood ear mushrooms, soaked and drained
* 100 g chả sống (pre-seasoned raw ground pork mixture), thawed
* 4 cups Vietnamese flavoured chicken broth
* 2 cups napa cabbage, thinly sliced
* bún, cooked rice vermicelli
* green onion, sliced thinly as garnish

Mix the ground pork with the rehydrated mushrooms.
Shape into small meatballs.
Heat up the chicken broth.
Drop the meatballs into the broth.
Add the napa cabbage.
When the cabbage and meat is cooked (about 10 min), turn off the heat.
In a bowl of rice vermicelli, ladle soup over it.
Garnish with green onion and top with ground pepper.
Tada!

IMG_9105 IMG_9106
Meat mixture and cooking the meatballs.

IMG_9108
Perfect for a cold night!

For other Vietnamese soups that can stand alone as a meal:
* Bún Gà Xả (Lemongrass Chicken Soup)
* Bún Riêu (Crab and Tomato Soup)
* Cháo Ca (Fish Porridge)
* Cháo Gà (Chicken Porridge)
* Miến Gà (Vietnamese Chicken Bean Thread Noodle Soup)
* Wonton Soup

Monday, November 2, 2009

Pumpkin Fritters

Because we didn't get enough of fritters, we made more... Well, I had planned on making this recipe when I spotted it on The Oprah Magazine Cookbook (by the way, I really enjoyed this recipe compilation - every recipe had an accompanying tantalizing picture - and there are recipes from numerous chefs). It seemed I found every pumpkin recipe that exists when I was searching for Thanksgiving recipes. This one caught my eye because of the use of pumpkin purée and because it's a fritter! Who's going to turn down deep fried dough, rolled in sugar?

IMG_9098

Pumpkin Fritters - Makes 10 servings (about 20 fritters)
From The Oprah Magazine Cookbook by Chef Colin Cowie.
I halved the recipe since we were only 6 people but we could easily have eaten it all had I made the whole recipe! The batter is quite wet so my sister suggested adding a bit more flour (and baking powder). I don't think it's necessary; it's just the nature of the recipe.The fritters puffed up nicely in the hot oil. We demolished these in seconds!

Cinnamon Sugar
3 tbsp sugar
1 tsp cinnamon

In a small dish, stir together sugar and cinnamon until combined and set aside.

Pumpkin Fritters
* ½ all-purpose flour
* 3-4 tbsp granulated sugar
* 2 tsp baking powder
* 1 tsp ground cinnamon
* ½ tsp salt
* 2 large eggs
* 1 (15 oz) can 100% pure pumpkin or homemade pumpkin purée (under 2 cups)
* canola or vegetable oil, for frying
* cinnamon sugar

In a small bowl, stir together flour, sugar, baking powder, cinnamon, and salt.
In a medium bowl, whisk eggs and pumpkin until blended.
Add the flour mixture and mix until combined.
Heat up oil in a small pot.
Frying 4 at a time, drop batter by heaping (measuring) tablespoons into pan.
Fry until golden brown, turning occasionally, about 4 min.
Using slotted spoon, transfer fritters to paper towel lined plate to drain.
Repeat with remaining batter.
Fritters will puff up, then deflate slightly when removed from pan. To test doneness, press lightly on fritters; they should spring back.
Roll each fritter in cinnamon sugar.
Serve with ice cream.
Tada!

IMG_9089 IMG_9094
Getting all the ingredients to make the wet batter!

IMG_9095 IMG_9093
Nothing nicer than deep fried goodness! Cinnamon sugar for added goodness!

IMG_9096
Rolling a fritter in cinnamon sugar!

For other squash and pumpkin posts:
* Butternut Squash Soup
* Pumpkin Bread & Muffins
* Pumpkin Ravioli
* Roasted Carnival Squash
* Roasted Butternut Squash & Pizza
* Vegetable Pot Pie

Sunday, November 1, 2009

Roasted Carnival Squash

A Thanksgiving meal wouldn't be complete without some squash! I spotted pretty squashes at the Farmer's Market and thought they would help dress my table. However, nothing should be left uneaten, so we cut it up and roasted it (more specifically, my sister L). Nothing better than decoration that doubles as food! I searched the internet and it seems these orange striped squashes are carnival squashes. They tasted awesome and I really liked the spotted peel!

IMG_9080

Roasted Carnival Squash - Serves 6-8
My sister also suggested using maple syrup instead of brown sugar.

2 small carnival squash
2 tbsp oil
2 tbsp brown sugar
salt, to taste
freshly ground black pepper, to taste
rosemary from 2 sprigs, chopped

Cut the squash in half and remove the seeds.
Cut the squash in slices and place in a bowl.
Add all of the remaining ingredients and mix until the slices are coated.
Place the slices on a baking sheet, in one single layer.
Bake at 375F for 30 minutes or until the squash is cooked and soft.
Tada!

IMG_9067 IMG_9072
Such a pretty heart shape!

For the rest of the Thanksgiving Menu: